
Twelve Tips to placing a well secured Peripheral IV Cannula
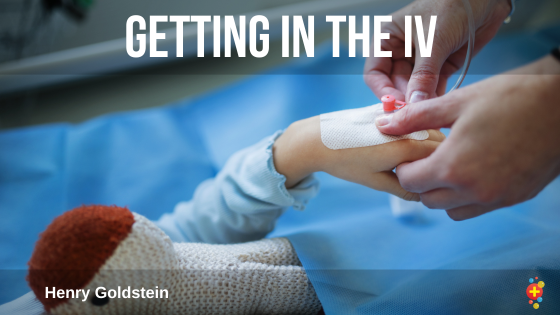
Placing peripheral IV cannulas (PIVC) is THE paediatric procedure. Rather than including every step toward becoming a 100% sharpshooting cannula guru (I’m not!), this post focuses on securing a cannula. That is, making it last long enough to investigate & treat the child, and, if required, for several days of admission.
The need for repeated cannula placement isn’t just “annoying” for ward staff – they’re genuinely traumatising experiences for children and their families—a good reason to aspire to keep that first PIVC as secure as possible. Bear in mind, this is not a post about access in a resus situation; there are IOs for that. This post emphasises some key tips for securing a PIVC that will last the distance.
You are caring for Roman, a severe pre-school wheezer who is vomiting and moderately dry. He needs IV hydration in addition to IV steroids & you’d like a venous blood gas for your troubles, too, as you think he’s getting worse. But, he’s not so sick that he won’t fight you off; his hypoxic agitation mandates that rather than a gentle cuddle and songs, he’s a raging ball of fear. So, with the help of four others, you have him suitably positioned and calm for a few minutes. You find a vein in his plump wee hand, and…
Zip, your 24g IV goes in on the first attempt. Boom! Flashback, gas taken, bloods off. Okay. Flush, please.
Now he’s getting cranky. And squirming. And screaming. You’re holding his sweaty hand firmly, plus the cannula as the extension set is attached. The assistant quickly applies the first layer of tape. Within seconds, the ends are curling. The tension rises. The assistant whacks on the next layer of dressing. And the next. You ask them to try to flush the line; it’s ‘stiff’. You know it’s in the vein; now it’s kinked!? The dressing is beginning to lift.
Roman is losing it, crying, trying to escape. Mum says, “It’s almost done, honey.” nervously. (She’s squished up against the railing on the far side of the bed, holding Roman still and looking a bit pale herself.) Someone says, “No more needles!” Roman doesn’t care. He wants it all to stop and is getting sweatier and more upset. Your team tries to retape, but Roman wriggles. You can see the cannula on the skin, a mess of sweaty, blood-stained tape. Roman’s Dad groans loudly.
It’s fair to say this is going badly. How did we get here? How can we avoid it? As with all the simulation training we discuss, this is one you need to go over a few times, both in your head and in practice (with ‘smoother’ cannulations). Here’s one framework:
1. Decide
Decide that the cannula is genuinely indicated. A line you don’t believe in is more likely to fail. I will say in my head (or out loud) why the cannula is required: investigation or access. The main caveat is that if it’s for access in the resus setting, know your backup and your threshold to use it. For any cannulation attempt, consider the alternative. What if you fail? Most departments have a strict “three strikes and you’re out” policy. Stick to it, and ensure your colleagues, regardless of seniority, do too.
2. Plan
“Plan” is the keyword throughout this post. In truth, every aspect of success for this procedure comes down to planning. Here are a few things to consider
Where (patient): When you have time to plan the cannula, do precisely that! Plan your first pass site & a couple of backups. Look in all appropriate places for each child. In the neonate, hands or feet are preferred. Generally, I use the rule that until a child is walking, feet are just “upside-down hands” from the point of view of access. I also apply this rule to children who can walk but are likely too sick to do so for the duration IV access is required.
In ambulatory school-age children, this usually means both hands before both cubital fossae before other sites. IVs around joints, particularly the elbows, can be a source of immense frustration to the patient, ultimately limiting the cannula’s life.
Aim to cannulate the best vessel. Don’t “save them” for someone better; give yourself the best chance of first-time success!
Cream them! If you’ve selected the target vein and backups, use LMX4 or AnGel and allow sufficient time for it to work.
Where (physical space): Are you happy with the child’s current location? Using a treatment room on the ward may be more appropriate. Get your equipment ready. Make sure you do this as much as possible outside the child’s line of sight; seeing blunt needles and syringes waved around in the air makes anyone anxious, least of all the reflected anxiety from the patient and their family. Be discreet but not secretive.
Furthermore, use the treatment room if you’re on the ward and the child can be moved. The child’s bed should be a safe place as much as possible. Likewise, you’re more likely to have everything you need for a successful line in the treatment room, not just spares, but the distractors too!
Be systematic in your preparation. I lay things out left to right in order of usage. If you have time to trim things up or down for different ages, acuities, or breadths of investigations, it pays to set up yourself.
Use an appropriately sized cannula; in the words of one experienced paediatrician, “Yellows (24g) are only for babies.” Knowing your tools and environment puts you at ease and improves your likelihood of success.
Specifically, get the gear you want.
A surgeon friend told me once, “No one minds or really remembers if you wait for a particular piece of kit if the procedure goes seamlessly. But everyone remembers the mess and scrambling when you need that one piece of kit you thought you could go without at a key point of the procedure.”
If there’s a big kerfuffle over not having the right tools for the job, it will be on you, the cannulator. In the same way you wouldn’t “just have a crack” at an airway, a major bowel operation or a lumbar puncture, placing an IV is a procedure that deserves respect and preparation.
3. Prepare your team
Find the staff who will assist you. Cannulating kids is at least a two-person gig, often more once you adjust for age and acuity. Check they are comfortable assisting and state the plan, with specific mention of ‘high-risk times’: immediately after skin breakage, before securing the IV, and whilst obtaining blood from the cannula.
For a child you suspect will fight or particularly kick, it’s good to mention needlestick. If you believe the situation is becoming unsafe from a needlestick perspective, pause the procedure, de-escalate, and resume with additional pairs of hands.
At the bedside, explain to the parents. If they are to assist or comfort the child, explain what is required and offer an exit strategy (timeout, etc.). After a couple of syncopal parents, I’ve recently included a bit about feeling faint / lying down on the ground.
So, we can pretty comfortably describe roles for five people in addition to the patient.
- Cuddler (parent)
- Distractor (parent or staff)
- Stabiliser and tourniquet control
- Cannulator
- Cannulator’s assistant and taper
- Plus, someone to run a blood gas (who will be of no help in the ~5 minutes thereafter)
Generally, get at least one more person than you think you need. Consider your colleagues’ experience levels. If you are being assisted by four staff who’ve been paediatric nurses since you were in nappies, listen to their advice.
4. Positioning for the team
Ensure everyone is in a comfortable position; you will work better if you are comfortable.
For children or in the emergency department, I generally kneel on a pillow, as it provides a broader, more stable base, allows others to sit on the bed, and enables taping from a wide range of angles.
In neonates, I set the resuscitaire at my waist and ensure there’s a step for my more diminutive colleagues.
Optimise the lighting – often shining the brightest light source at shiny skin recently doused with liquid will make veins evaporate. You can experiment with aiming procedure lights about 10cm from the target and using the ‘shadows’ for contrast. Like a wily Instagram filter, it often makes the unexpected stand out!
5. Position the child
If the child is too young to sit but too large for a resuscitaire, have them supine.
Pre-schoolers and school-aged children seem to prefer a Koala cuddle. In this position, the parent sits on the side of the bed. The child faces in for a cuddle, with legs to one side. On the other side, the arm of choice is placed under the parents’ armpit, with an assistant further stabilising & on tourniquet control. Alternatively, a toddler can be cannulated in the same manner, with the leg in the same position as the arm described. This is an excellent position for distraction therapy, either by a parent or one of your assistants. You can cannulate from the same side or reach across the bed whilst kneeling.
School-aged children may receive IV cannulation whilst sitting up, perhaps in a parent’s lap. You may have already established this when the child was wholly compliant with a look in their throat and ears on examination, but be careful not to underestimate how fearful a child might be.
Sheet restraint is certainly not the first way to go, but if you deem this the most appropriate way to cannulate a particular patient, wrap a sheet around and under the child with the desired access point free. This wrapping will utilise some of their own body weight to keep them still. Do not restrain the child longer than necessary. If you need multiple attempts, release the wrap and have a ‘cool down’ time between attempts.
Do not say, “This won’t hurt.” This is lying to the child and erodes their trust.
Do not say “just a little stab” – it primes them for pain.
Distract, distract, distract.
And, Don’t Forget The Bubbles.
In addition to topical and systemic analgesia (ensure you’ve listened to Andy Tagg’s talk on Paediatric Pain Management), adjuncts such as nitrous oxide can be considered. If you’ve come to this point, please reconsider the indication, level of distress, timeliness of access & duration of therapy; will this child need a PICC or Long-line instead of this PIVC?
Some phrases to use when the child is already distressed;
“You can be as loud as you like, so long as you are as still as a stone.”
“Brave doesn’t mean that you’re not scared. Brave is being a bit scared and doing it anyway.”
“We are going to look after you and help you feel better.”
If the situation has deteriorated and you are confronted with a screaming, sweaty, distressed child who is fighting, and the cannula is indicated, get it done. Identify when you’re past a point of reassurance and distraction, secure the access, and allow for a cuddle, reconciliation, and care afterwards.
6. Place the cannula
You’re in! You felt the pop and saw a red streak of flashback. (Or the saline you’ve put in the hub changed. Thanks, Andy W!)
Now’s the time to remember why you’re doing this. If it’s for bloods, get the IV to a relatively stable point and drag the blood out via a 3mL syringe on a blunt needle.
If you need more blood, use more syringes. If everyone (especially the child) is calm at this point, it might be possible for an initially slow vein to speed up. I’m not sure why, but sometimes it appears that veins stop bleeding for some time (say, a minute or two), even when the IV is in, only to open up and pour out blood a few minutes later. If you need a reasonable blood volume and things are stable, take your time and get the amount you need to send the tests. I’m thinking here of, say, a new diagnosis of leukaemia, where the line might be for transfusion; hence, pre-transfusion investigations are essential. Remember, the only ‘common’ tests you need from the vein are a blood culture and coagulation profile. Capillary blood gas, FBC, Gp & hold, CRP, and UEC can all be scraped off the skin from a heel/finger prick. Don’t compromise a difficult “access-oriented” cannula waiting for tests you can get elsewhere.
If the line is primarily for access, whilst the flow might not be impressive, ensure you have the cursory investigations you need and secure and flush.
Keep hold of the limb and cannula until you are happy it is secure. The scenario at the outset of this post emphasises the importance of everything but ‘getting the IV in’ in kids, and here’s where it really, really counts.
If you miss, take a breath! All is not lost! Keep positive! Decide if you’ll start from scratch or if your next best attempt can be undertaken with minimal fuss in changing positions. Visualise the cannula’s tip into the vein. Visualise the cannula passing along the length of the vein. If you’re out, say so. Verbalise your backup plan & action it.
Right, let’s secure this line properly.
7. Site
You’ve already considered the location of the PIVC and how best to stabilise and secure it once you’re in. It’s good form to think about your plan to secure the line at the same time you’re placing the LMX4 at the outset and explain the plan to your team in advance of the attempt. Remember, elbows are wriggly, ankles are strong, and foot stabilisation can be more challenging in a usually active toddler. These considerations may alter your choice of target vein.
8. Sweat
Children who are febrile sweat, as do kids in respiratory distress or heart failure. If you’ve spotted these things from the end of the bed, prepare for a sweaty cannula. Expect most ‘gentle’ adhesive glues to melt off before stabilisation. I rely on Cavilon (3M), which acts like a glue. I’ve found it better than SkinPrep and others and will use it with the first run of taping. (It’s also good for sticking your glasses to your nasal bridge if they habitually slide off during this procedure!)
In the scenario above, the cannula kinked during taping. This was never an easy situation, but it was all the worse because the child was sweaty.
If things are ‘not right’ and you know the cannula is in the right spot in vivo, keep things calm and return to the start of securing. Visualise the cannula and the entry point; it’s where it’s most likely kinked. Feed it to the hilt and give it a small flush.
In the meantime, use your skin preparation/glue to clean around the cannula and methodically step through each set of tape/dressing, with a small flush at each point. Keep talking to your colleagues in a low, calming voice, and direct them to what you want. If you’re not sure, ask. If unsatisfied with something, firmly but gently redirect things until you are convinced of the cannula’s security.
9. Taping
There are many ways to ‘best’ secure a PIVC; to my knowledge, there is not much evidence. Here, we’ll give one way to do things, but first, think about what you’ll use to secure the line.
Good choices include Hypafix and brown tape or similar. There’s a trend away from brown tape, as it is pretty harsh on the skin. Don’t waste time, energy, or resources with micropore and paper tapes, as they are useless now.
In total, you’ll need;
- two thin pieces to secure the cannula to the skin
- a windowed dressing (“the teddy bears”)
- Another piece of wider tape is needed to attach the cannula’s hub to the teddy bears further.
- Three pieces to secure the armboard
- One or two armboard, depending on the location
- In addition to the tapes mentioned, a longitudinally divided piece of the accessory tapes that come with the ‘Teddy bear” type dressing will do the trick.

The most important part of taping is securing the cannula to the skin, with either
- a) two “figure 8” or “awareness ribbons”, or
- b) a “figure 8” (#1) and another piece across the hub horizontally (#2).
Typically, these pieces need to be relatively narrow, 0.5-0.8cm wide, and placed to prevent the PIVC from just walking out of the vein. These are placed as shown in the diagram below.

Once the cannula is at least attached to the skin, give it a flush. If the line is hard to flush at this stage, either the cannula is kinked, walking out, or has blown. Visualise the base of the cannula and restart the taping from the beginning. If you’re happy, proceed to place the teddy bear-style dressing.
Wrap it around the base and have the bulk of the dressing proximal to the PIVC insertion point. In some situations, a “double teddy bear” approach can be helpful, with one aiming proximally and the other distally from the entry point. It’s also good to put some barrier between the cannula’s hub and the skin. A small piece of microfoam or foam with the arm boards reduces the chance of a pressure sore at this spot. Lastly, “put the teddies to bed”, with a further piece horizontally across the hub.
Throughout the taping above, the cannulator will not have let go of the hand/foot/limb, so we’d better crack on and get the board placed.
10. Board/splint and bandages
I’ve used the terms armboard and splint interchangeably below. I will use a splint for every PIVC I place in a child under ten, with three points of contact to the board.
Hands: Aim to splint the wrist. The commercial arm boards were designed for this, so use the many options. This means that the board finishes at either the MCP joint or fingertips, usually depending on the cannula’s location and the child’s age. For neonates, I’ll leave the fingers free if I can help it—likewise, kids over five. I’ll tend toward strapping the board at the proximal phalanges, wrist and forearm for infants and toddlers. Leave the thumb free. Ensure all fingers are pink and visible to be checked.
Feet: If you have a bendable splint, it’s good to have it pre-fitted before things start. In a pinch, they usually conform pretty easily. Again, three points of contact – distal foot, ankle, lower leg. If, however, your unit has rigid, breakable boards, you’ll need two of them. The first you break, place it as above. Use the second board to brace the first like a splint at 90 degrees and affix it with two additional pieces of tape. For best results, place the bracing board on the same side (medial v lateral) as the cannula; this protects the PIVC from direct trauma and means there’s a handy place to tuck the extension tubing.

Elbows: With my background heavily in paediatrics, I’m loathe to use cubital fossa veins, but sometimes they’re what you can get. I also advocate for the two rigid splints in this location (without breaking either!). The perpendicular splints reduce the child’s chances of rotating and squirming out of the dressing.
Attach the trailing extension set to the splint/board for all the above.
Scalp: Scalp veins are becoming less utilised. I’m mentioning them here more as an item of curiosity, focusing on securing the cannula once it’s in a scalp vein. After the tape and “double teddies” as above, find a small foam cup and cut a 3cm wide, 1.5cm high portion of the extension line’s edge. Affix three points of tape to the scalp and bandage with a lightweight crepe bandage. It should look like a cross between an Ancient Egyptian Mummy and a Fez.
Likewise, the endpoint of bandages vs. large tapes vs. tubigrip vs. minimal outer dressing is controversial between practitioners and units. There is no ‘standard’ in this; I like thin tube bandages, as they don’t catch, aren’t too bulky and are easy to check
11. Yankers and biters
For kids like Roman in the scenario, it’s worth asking the parents if the child is ‘a biter’; besides being a risk to staff safety, biting out cannulas is not uncommon. Some kids will yank out their IVs with a free hand in fear or rage. This is never an easy situation.
Sometimes, the child’s free hand is bandaged to protect against cannula removal from the contralateral limb. A similar “boxing glove” style of wrapping around both the cannulated hand and non-cannulated hand can be utilised to at least delay removal via biting. Aside from this, it’s all down to lots of parental cuddles and astute observation.
Feeling confident about the plans described above, I set out to take a few illustrative photos with my toddler. I prepared all the tapes, the boards (no actual IV insertion, of course) and the dressings—a couple of each for a few different plans. The results were impressive; no successfully taped splint was in sight. Why? It was just me, and I was no match for a well, squirmy, enthusiastic child who rapidly pulled off boards and tape even as I reached for another. I implore you to ensure you have more people than you need!
12. Post-procedure care
In the immediate aftermath, leaving the room whilst the child settles might be good. Often, though, it’s best to take some extra time to calmly explain to the family what you’ve done, why it’s important, and some of the key points about caring for the PIVC. Yes, sending off the investigations is important, but likewise, this is a key point for good, clear communication and empathy.
We’d love you to share your tips for securing lines in the comments below!
In summary
– Placing an IV is a procedure that deserves respect and preparation.
– Decide and Believe the indication for a cannula.
– Aim to make the PIVC last.
– Plan & Prepare equipment, staff, parents & the child. Get at least one more person than you think you need.
– Positions need to be comfortable to distract, distract, distract.
– Plan how you will secure the line – personnel, site, sweat, taping, and protection.
– Securing the line can be harder than accessing the vein. Plan and prepare for it!
References
Additionally, although I’d initially planned to write a ‘how to guide’ from scratch, the RCH Melbourne team have already done a great job here: https://www.rch.org.au/clinicalguide/guideline_index/Intravenous_access_Peripheral/


